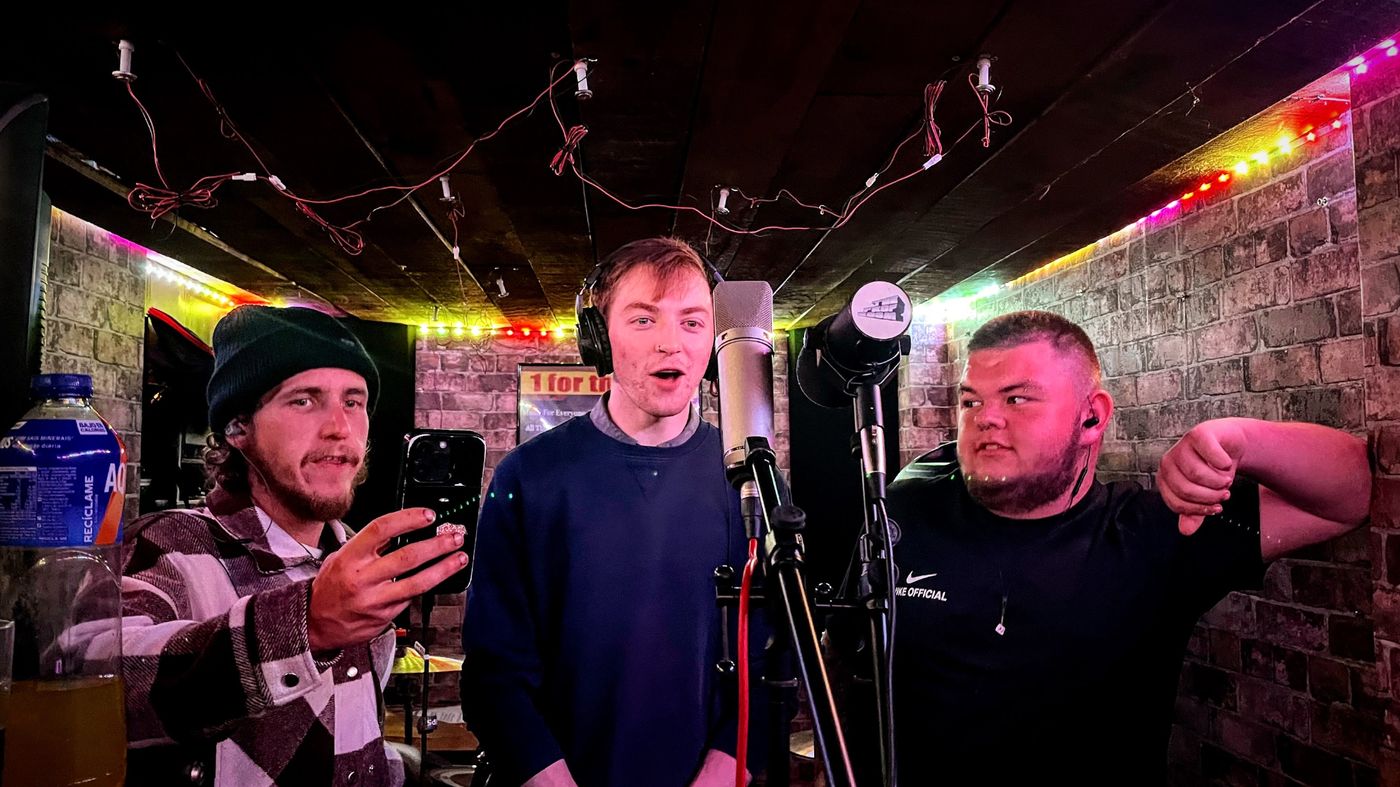
Fig 1: The Deadbeat Bracket
A great commercial mix relies on technical precision, but a great record relies on capturing human energy. For this next entry, I had the pleasure of tracking Deadbeat Bracket, an incredible alternative rock band featuring just four core elements: drums, bass, guitars, and vocals.
This project immediately presented logistical challenges. Because the university studios operated on a strict 9 AM to 4 PM schedule, our vocalist—who worked standard weekday hours—couldn't make the primary tracking sessions. To adapt, we split the production: rhythm section tracking in Studio One, with a plan to track vocals and guitar later in a small, minimally soundproofed shed in Stevenage (Cam’s studio).
Here is a technical breakdown of Day 1 in Studio One, focusing entirely on drums, bass, and the session management required to keep the human feel alive.
Day 1: The Drum Sessions
29th May, 2026
We started Day 1 by focusing on the foundation of the track: the drums. Almost immediately, we hit a wall with the snare drum. It sounded absolutely horrendous in the room, and our initial attempts to tune it only seemed to make the ringing and overtones worse.
Instead of recording a bad source, we took a step back, called a long break, and reset our ears. After taking the time to completely re-evaluate the snare tuning and dampening, we finally locked in a punchy, resonant tone that worked perfectly for the alternative rock vibe of the track.
With the drum sounding right in the room, I deployed a comprehensive 10-mic setup to capture the kit (Robjohns, 2003; Hirst, 2015).
The 10-Mic Drum Configuration
- Kick In: AKG D112. Placed inside the drum to capture the heavy, focused thud of the beater.
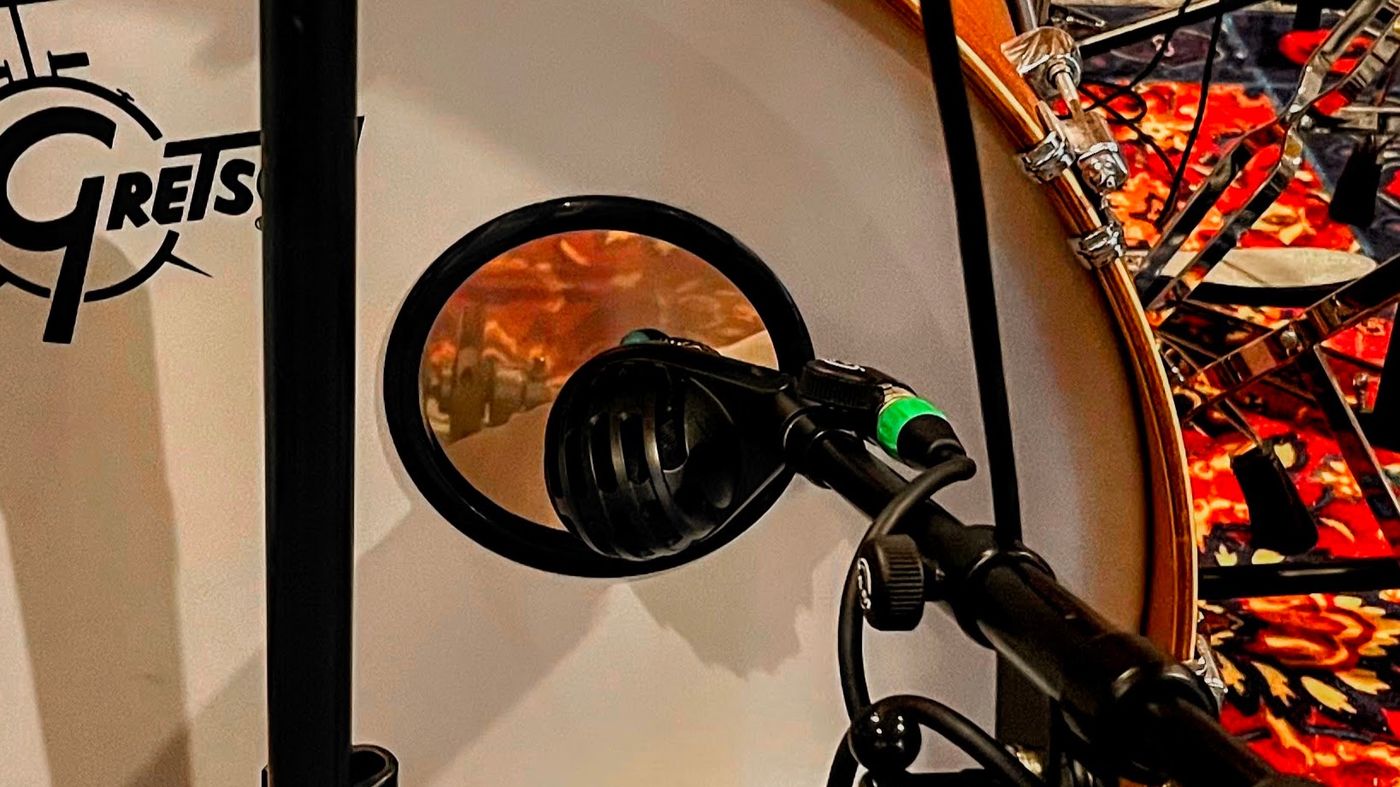
Fig 2: AKG D112 placed inside the kick drum
- Kick Out: Neumann U87. Positioned outside the resonant head to capture the sub-harmonic weight.
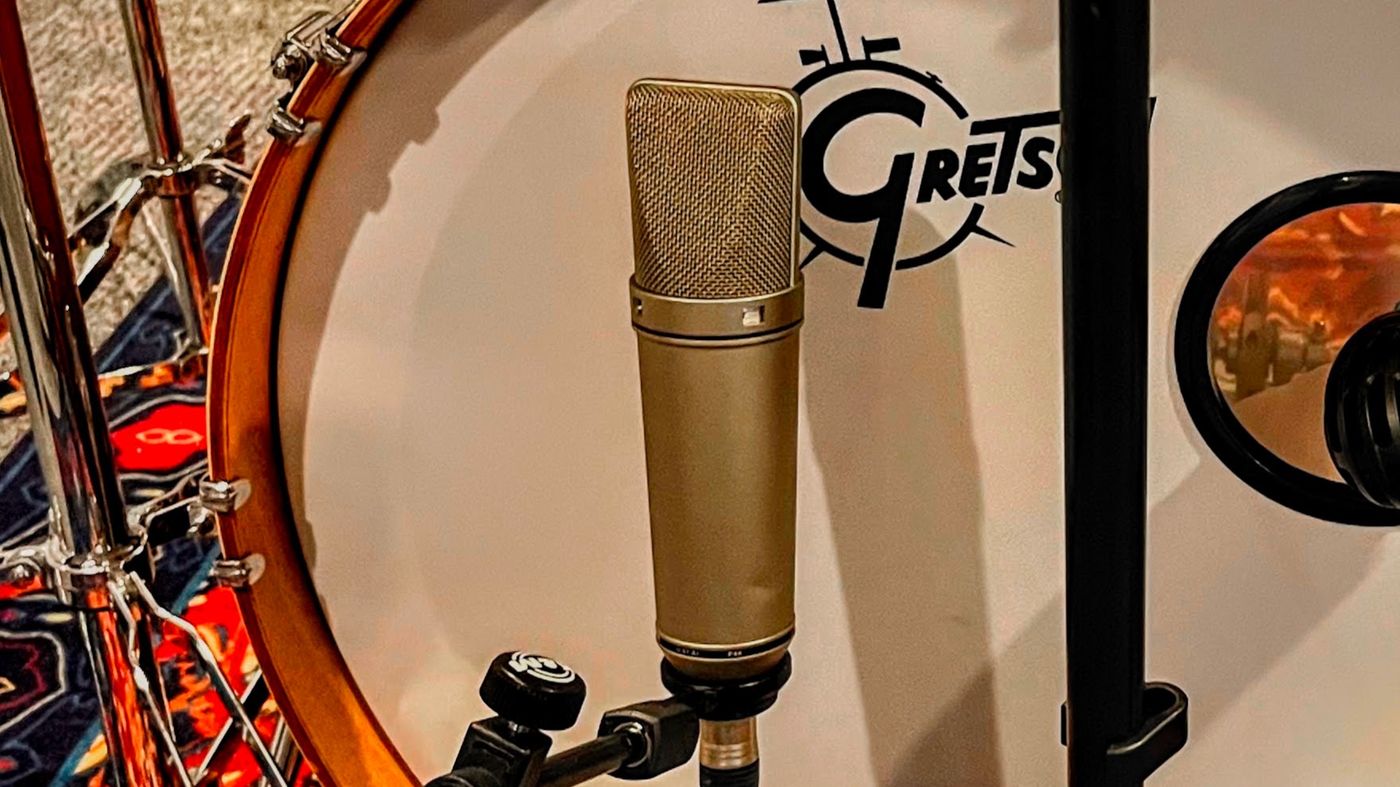
Fig 3: Neumann U87 positioned outside the resonant head
- Overheads (L/R): Neumann KM184. I utilized a matched pair of these small-diaphragm condensers to ensure a pristine, fast capture of the cymbals. To guarantee absolute phase coherence and keep the stereo image of the kit perfectly intact, both microphones were measured with a cable to be exactly equidistant from the center of the snare drum.
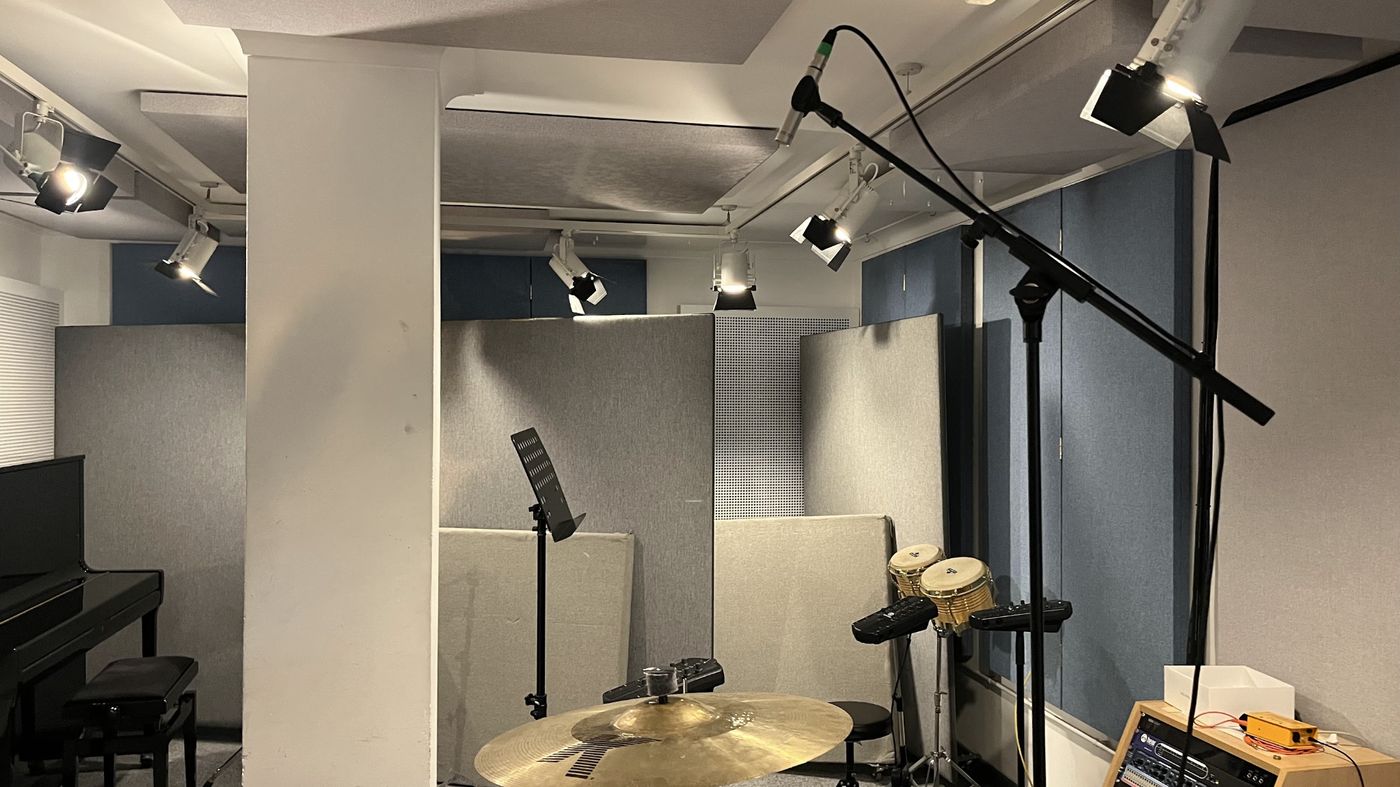
Fig 4: Left Neumann KM184 overhead
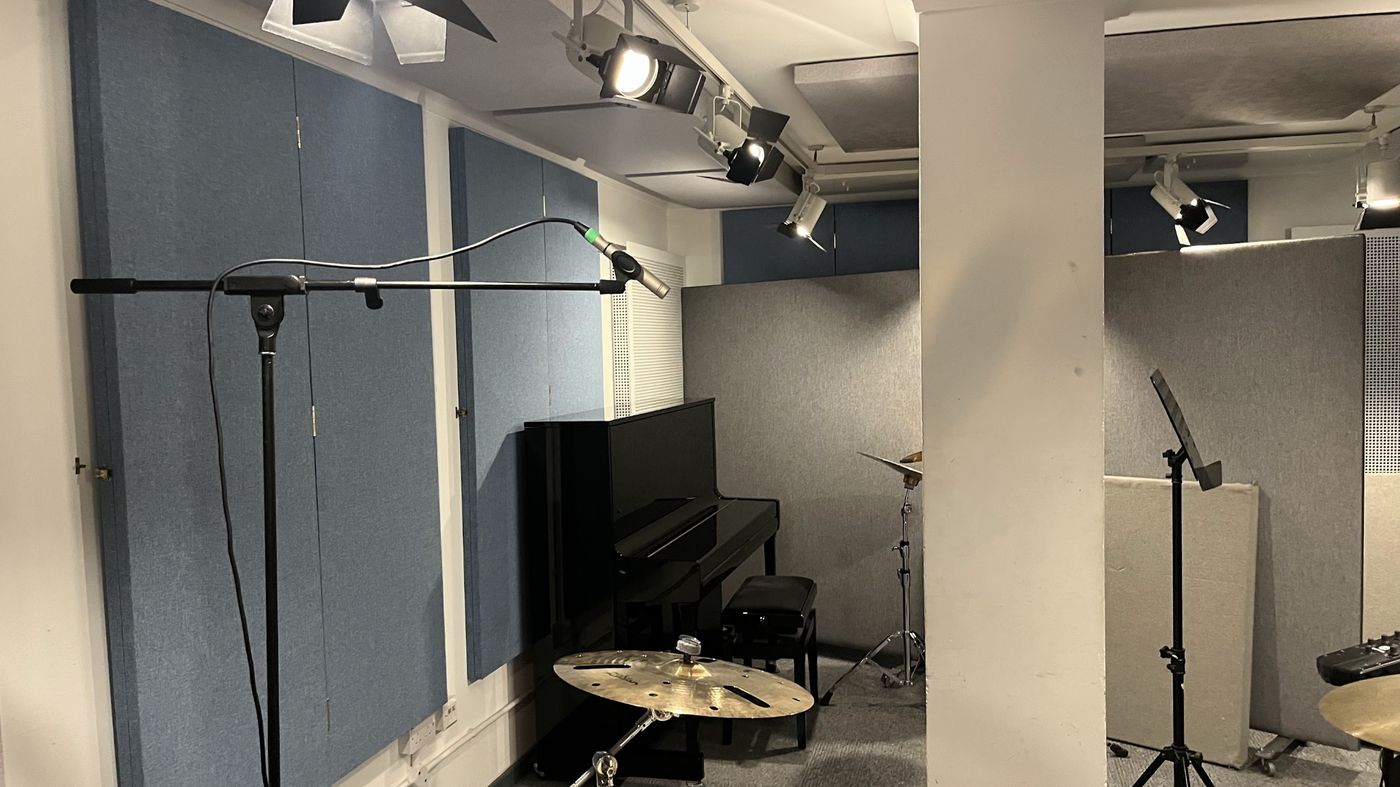
Fig 5: Right Neumann KM184 overhead
- Snare Top: Shure SM58 (Capsule Removed). Converting the 58 into a 57 by removing the grille, placed flush against the batter head for raw midrange crack.
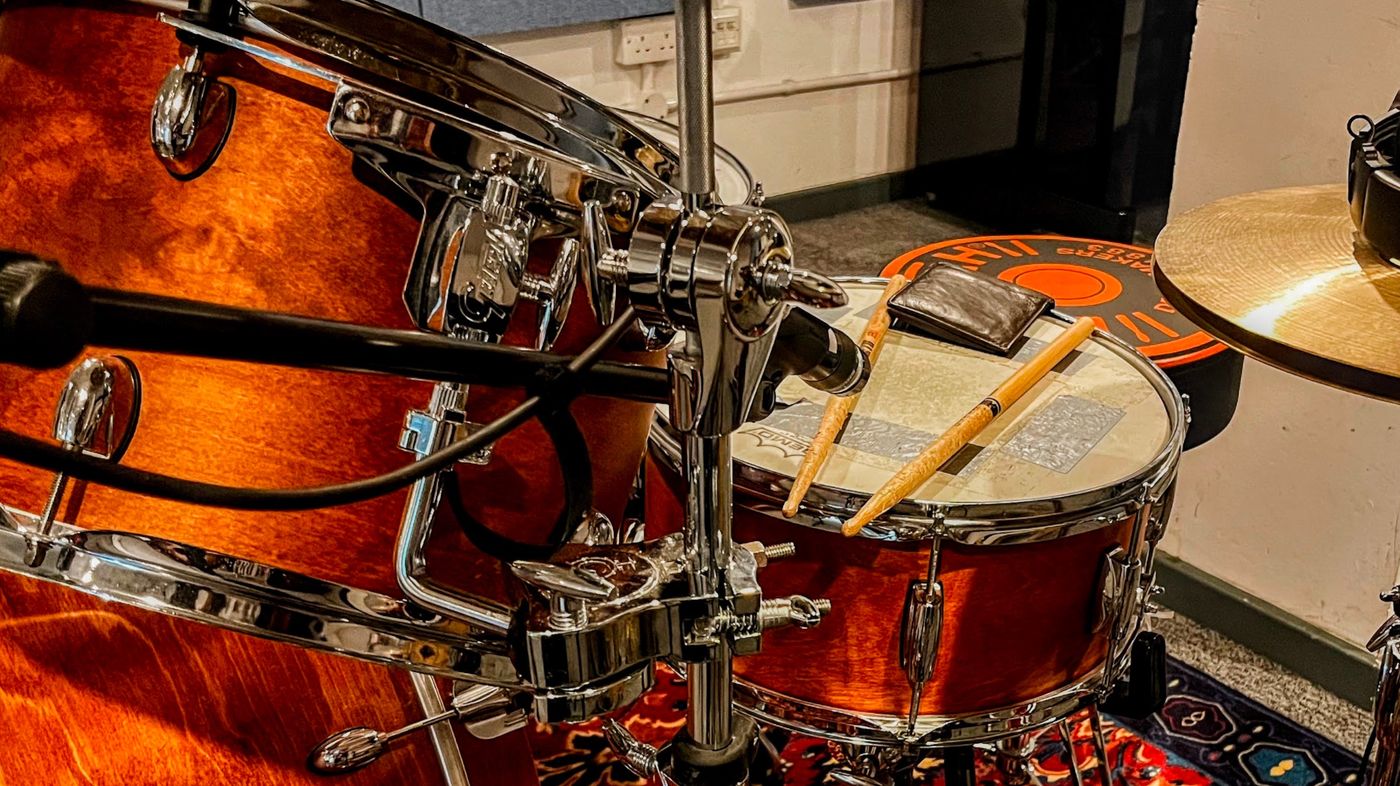
Fig 6: Shure SM58 with grille removed on Snare Top
- Snare Bottom: Rode M5. Pointed at the snare wires to capture the high-frequency sizzle and transient response.
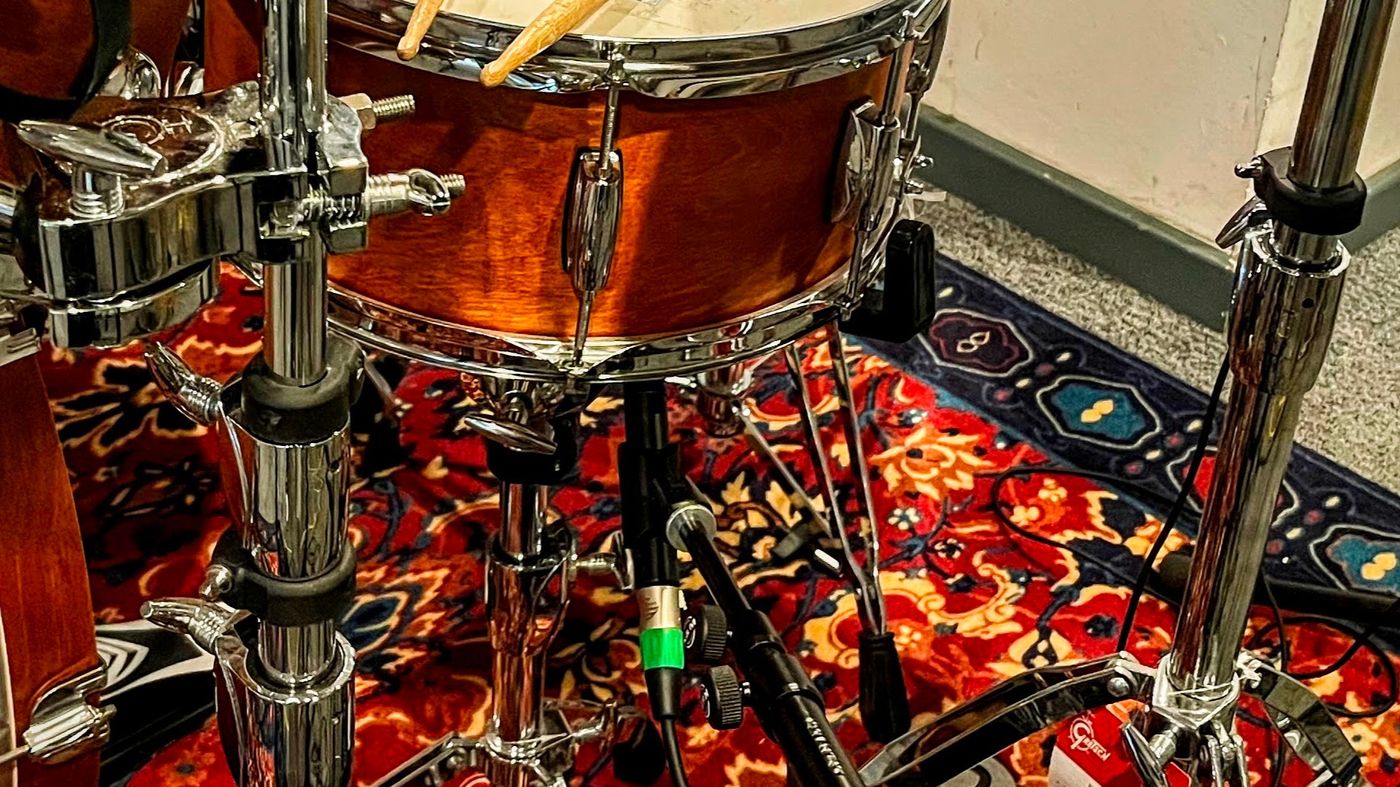
Fig 7: Rode M5 pointed at the snare wires
- Room L/R: Coles 4038. These classic ribbon mics were utilized as a spaced stereo room pair. They were deployed explicitly to capture the way the physical room was reacting to the acoustic energy of the drums, naturally rolling off harsh highs while capturing a thick, dark room ambiance (Bartlett, 1991; RØDE Microphones, 2018).
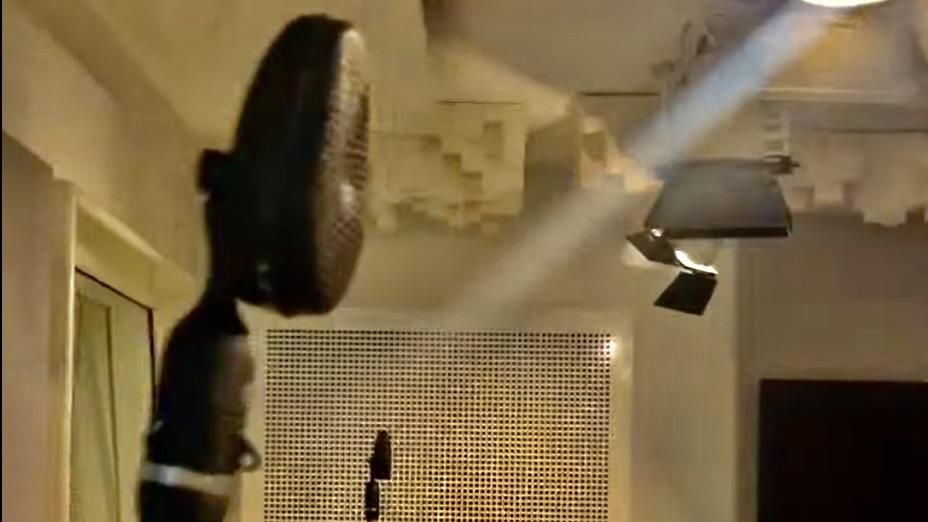
Fig 8: Coles 4038 spaced stereo room pair
- Wurst (Trash Mic): Sennheiser MD 421. Placed right in the center of the kit. When compressed, this aggressive dynamic mic acts as phenomenal "glue" for the drum bus (Schneider, 2014).
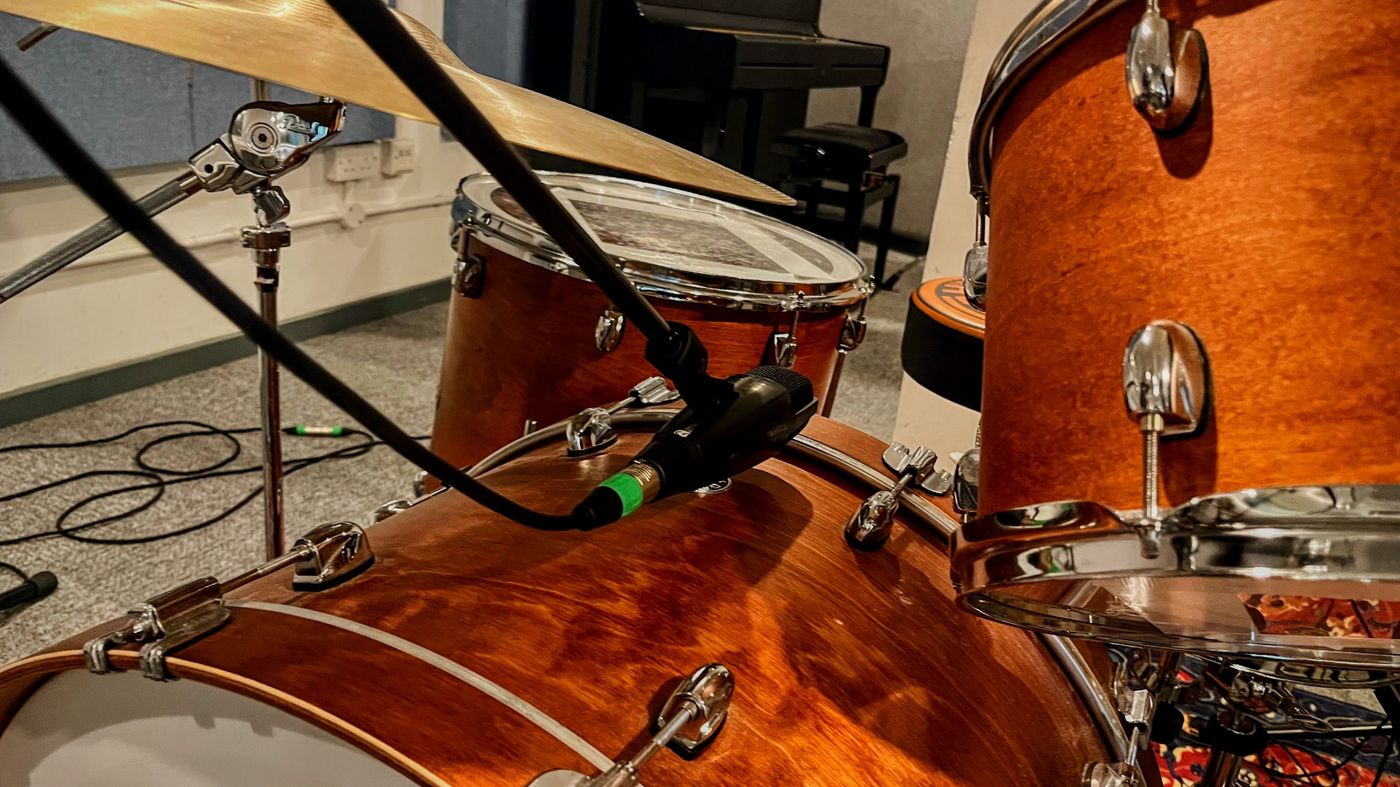
Fig 9: Sennheiser MD 421 placed as the Wurst Mic
- Hall: Neumann U87. Positioned in the hall outside the studio to capture the natural decay of the space.
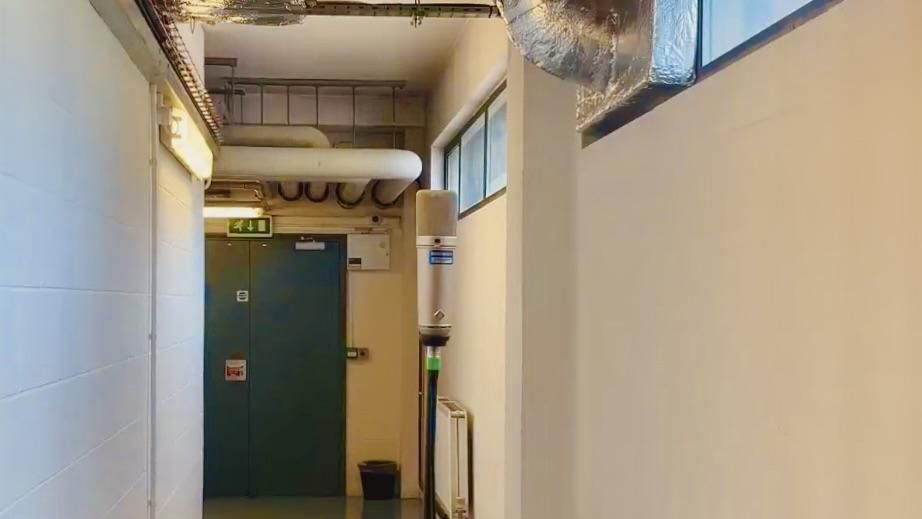
Fig 10: Neumann U87 positioned in the hall outside the studio
The Philosophy of the Take
Once we were wired up, the tracking process was fascinating. After one trial take to set levels, Cam delivered his first take—and it was magic. We tried running a second, third, and fourth take, but no other take matched the first take. We immediately reverted to that first, perfect take.
There were a few minor timing inconsistencies, but I specifically chose only to comp the most obvious errors. In an era dominated by AI generation and heavily quantized grid-locking, I am deliberately embracing the slight, natural push-and-pull of a live human performance.
Bass Tracking: Metronome Wizardry
With the drums comped, we moved on to bass. The bass was played by Harley, Cam’s nephew, who had recently joined the band. Despite it being his first time ever recording in a professional studio environment, he was a natural.
However, we faced a unique tracking hurdle. Because we deliberately allowed the drum tracks to breathe and fluctuate naturally in tempo, they weren't strictly locked to a grid. The song features several full-band breaks (moments of total silence), and Harley was struggling to count the gap and land exactly on the downbeat when the drums came back in.
Rather than trying to chop and align the audio in the DAW, Cam came up with a genius solution: manual metronome riding. During tracking, Cam sat at the console and actively switched the click track on in Harley's headphones right as the break hit, allowing Harley to count the gap perfectly. The second the drums came crashing back in, Cam muted the click. This kept Harley perfectly in the pocket without ruining the natural, un-quantized groove of the drums. It saved hours of frustration and tracking time.
The Hybrid Bass Capture
To ensure the bass had enough weight to compete with the vocals and guitars later in the mix, I built a massive multi-channel capture, treating the bass cabinet almost like a drum kit (Henshall, 2015; White, 2001):
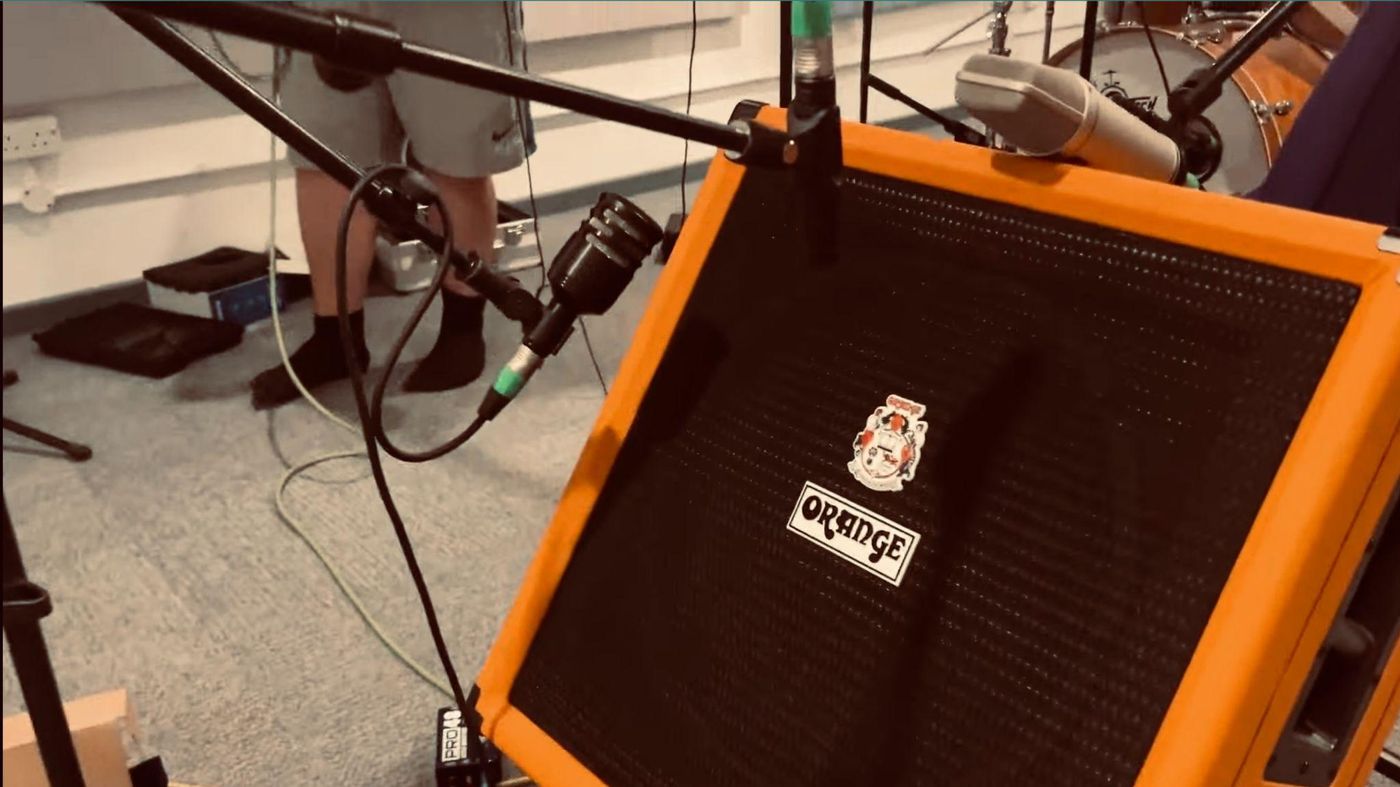
Fig 11: Multi-channel bass cabinet microphone setup
- Top: Neumann U87. Placed from the top of the bass amp facing down to capture the full-frequency detail and articulation of the amplifier. This technique helps in capturing the aggressiveness and the sub bass bloom of the bass (Bendeth, 2026).
- Rim: Audix D6. While traditionally designed as a kick drum microphone, I deliberately deployed this dynamic mic on the outer edge of the bass cabinet's speaker cone. This specific placement capitalized on the microphone's tailored low-frequency response, capturing a massive, aggressive bottom-end punch to anchor the foundation of the bass tone (Gatski, 2013; La Cerra, 2026).
- Middle: Rode M5 (Off-Axis). Pointed slightly off-axis at the center of the cone to capture the gritty midrange detail.
- Direct: DI Signal. A pristine, clean line straight into the console for safety and tone freedom.
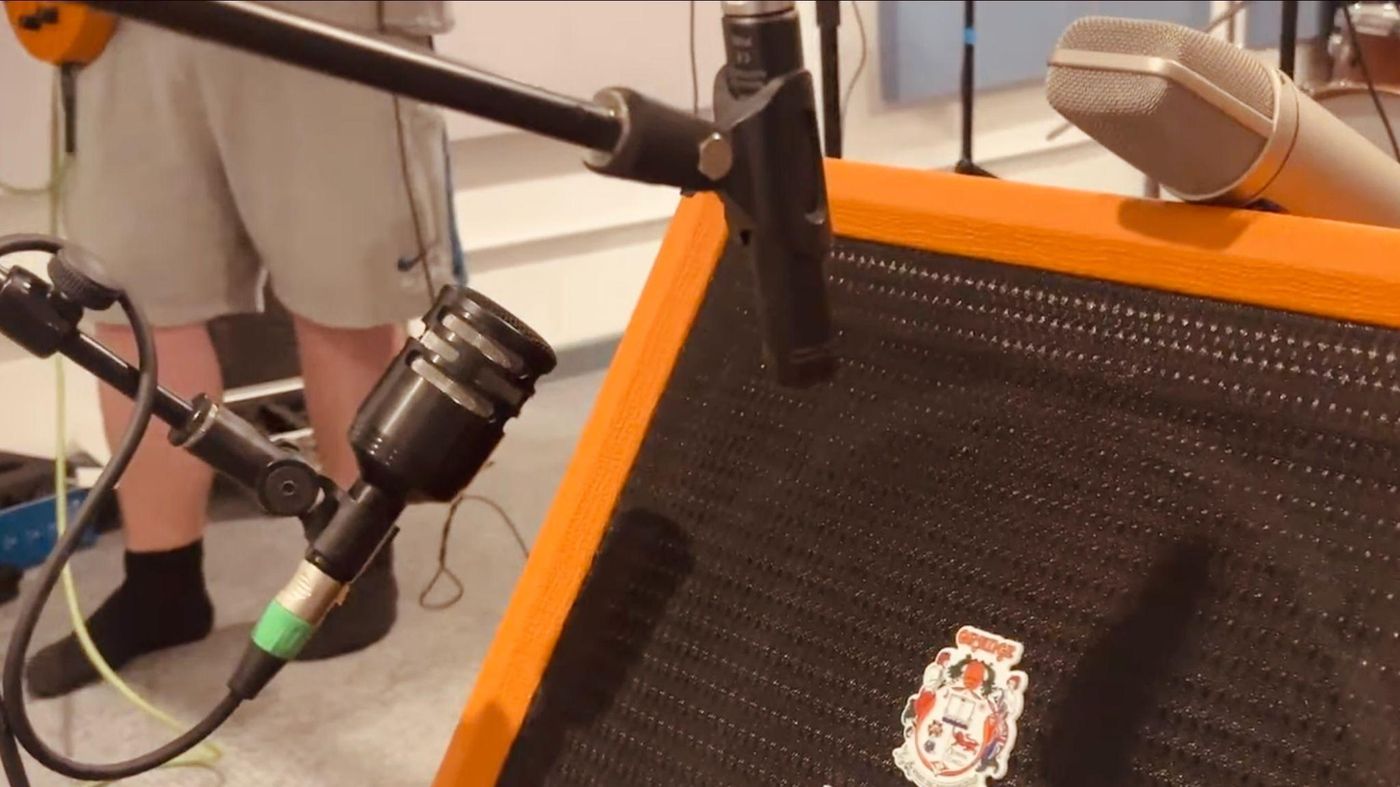
Fig 12: Bass micing Close-up
Studio Secret: Rather than striking the drum room mics, I left the Coles 4038 stereo pair active during the bass tracking. Blending these room mics into the bass bus captures the physical air moving in the live room, gluing the bass and drums together acoustically before they even hit the mixing desk.
Day 2: Stevenage, Punk Guitars, and Electromagnetic Mysteries
9th June, 2026
After capturing the foundational rhythm section in the pristine environment of Studio One, the production shifted gears. To accommodate our vocalist's work schedule, I packed up some mics and traveled to Stevenage to record at Cam's place—a minimally soundproofed shed studio.
I arrived an hour before the vocalist was scheduled to show up to establish the control environment. Cam was an incredible host and collaborator. Despite it being his own studio, he completely stepped back and let me run the session as the engineer. He assisted with the physical setup but remained entirely hands-off with the technical routing—allowing me full control over the preamps, monitoring levels, and creative decisions.
Sculpting the Punk Guitar Tone This day was completely focused on capturing a big and full guitar performance. The song is heavily rooted in a driving punk aesthetic, meaning the guitars were relentless, continuously strummed and heavily distorted tone.
As an engineer, it is crucial to know when to step in and when to get out of the way. I left the actual tone-shaping on the amplifier entirely to the guitarist to ensure he felt connected to his sound, focusing my efforts strictly on the capture. I utilized a multi-mic approach to ensure this wall of distortion had depth (Royer Labs, no date; Audio University, 2023; Beato, 2019):
- Amp Front (Dynamic): Shure SM57. The absolute standard for electric guitars, capturing the aggressive midrange bite.
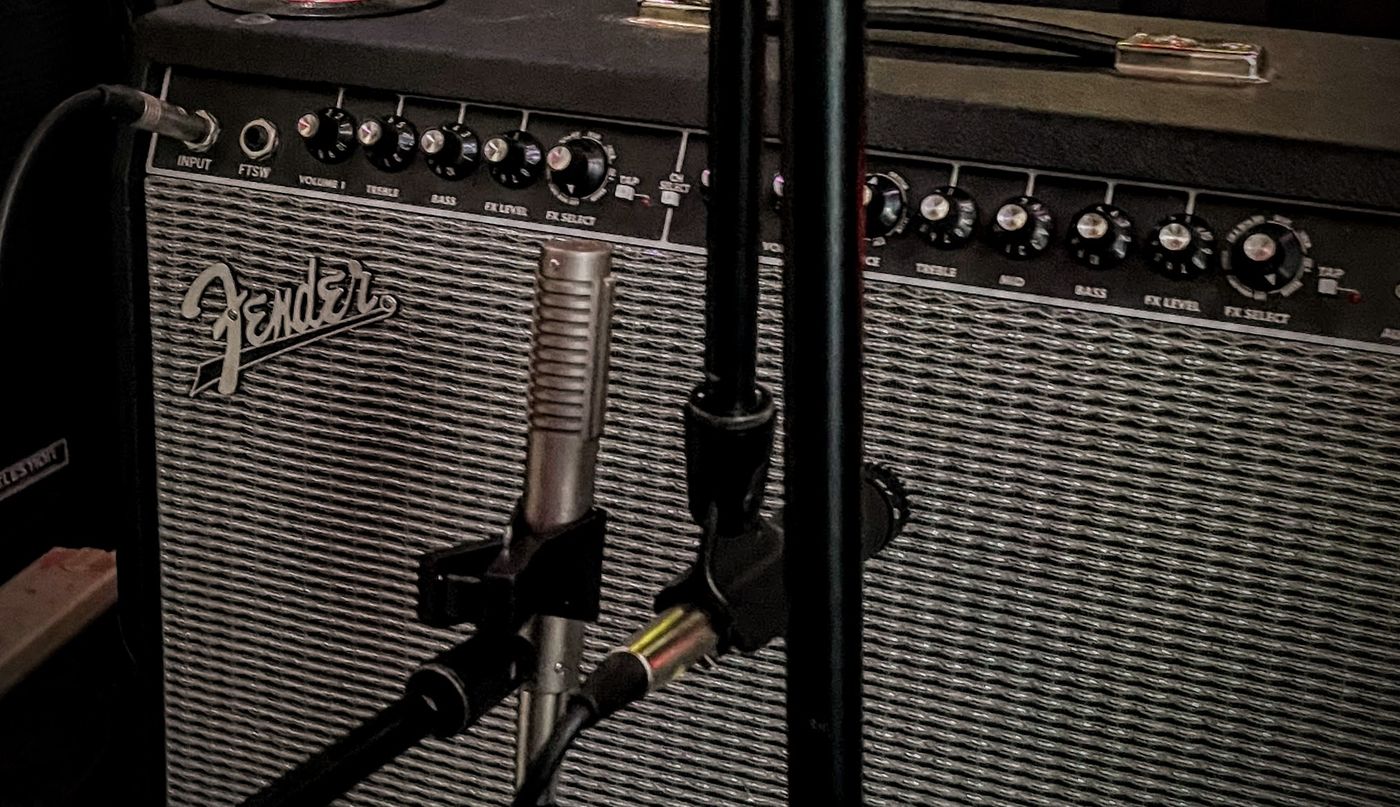
Fig 13: Shure SM57 positioned at the front of the amplifier
- Amp Front (Ribbon): Royer R-121. Paired with the 57, the ribbon element of the Royer smooths out the harsh, fizzy top-end of the distortion and captures a massive, warm low-end.
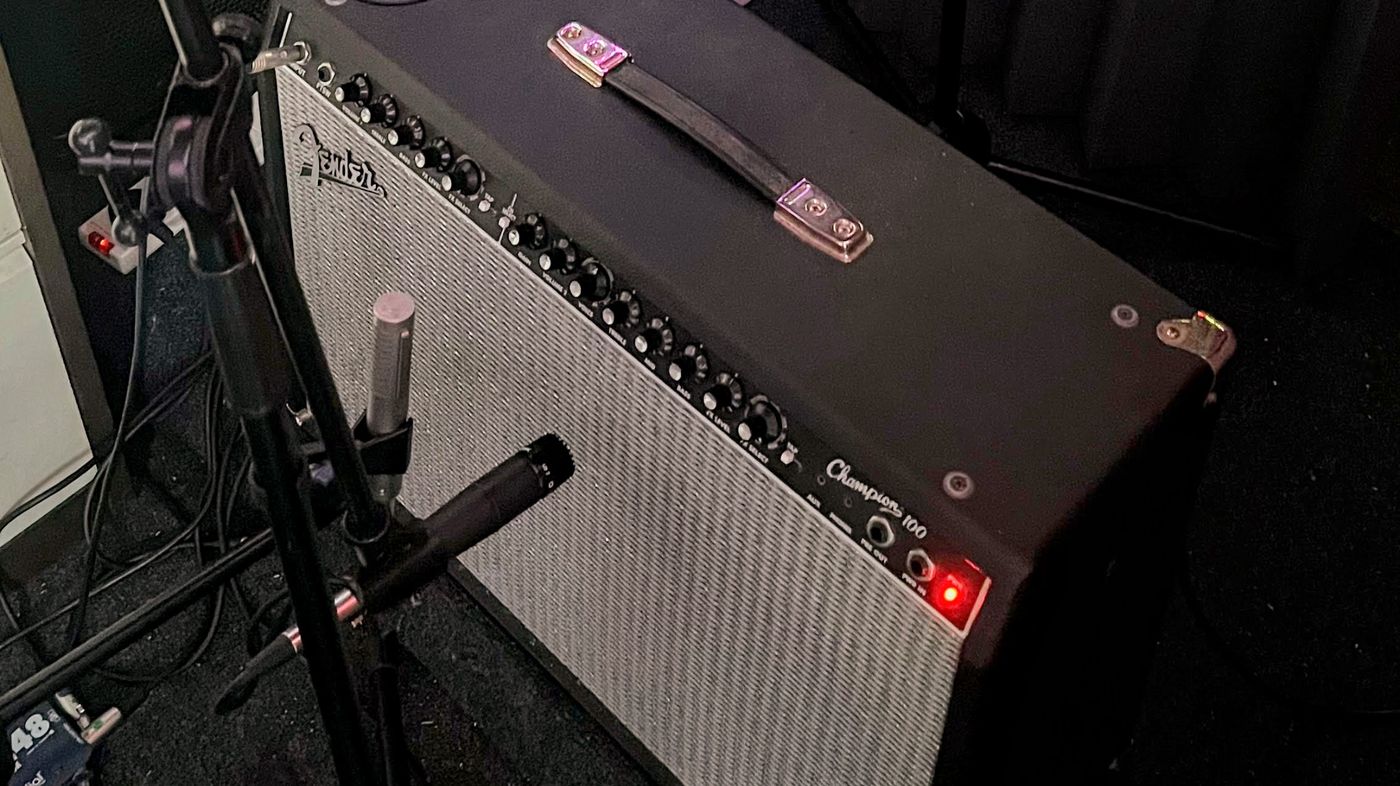
Fig 14: Royer R-121 positioned at the front of the amplifier
- Amp Rear (Condenser): AKG C414.This placement was a creative experiment that yielded fantastic results. I positioned this multi-pattern condenser at the rear of the open-backed cabinet, facing directly through it toward the guitarist. This unconventional technique captures the dark, resonant low-end bloom radiating from the back of the speaker cone, adding a massive, three-dimensional depth and raw cabinet character that beautifully complements the primary front microphones.
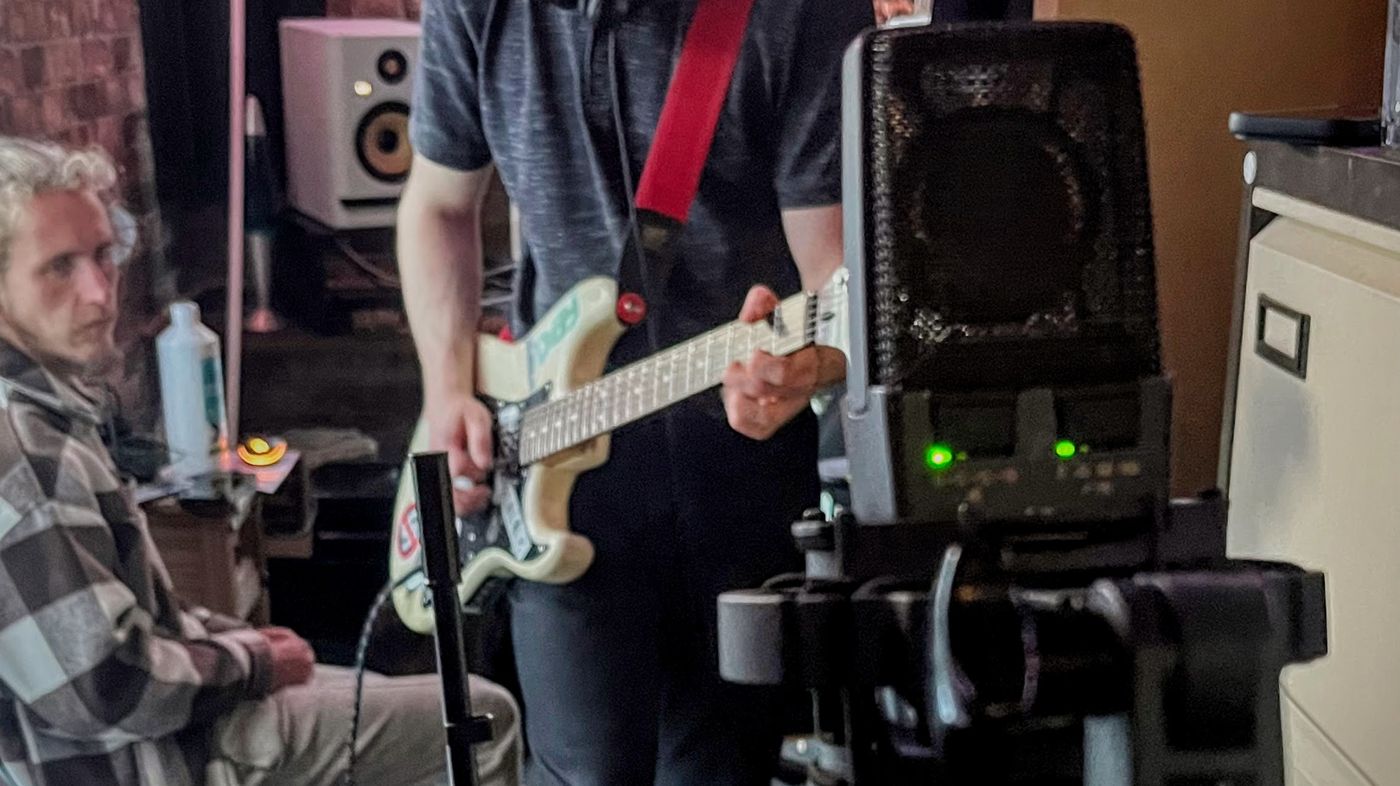
Fig 15: AKG C414 placed at the rear of the Amp
- DI Signal: While recording such intense guitars it is very important to also record a clean DI signal that can later be molded using plugins.
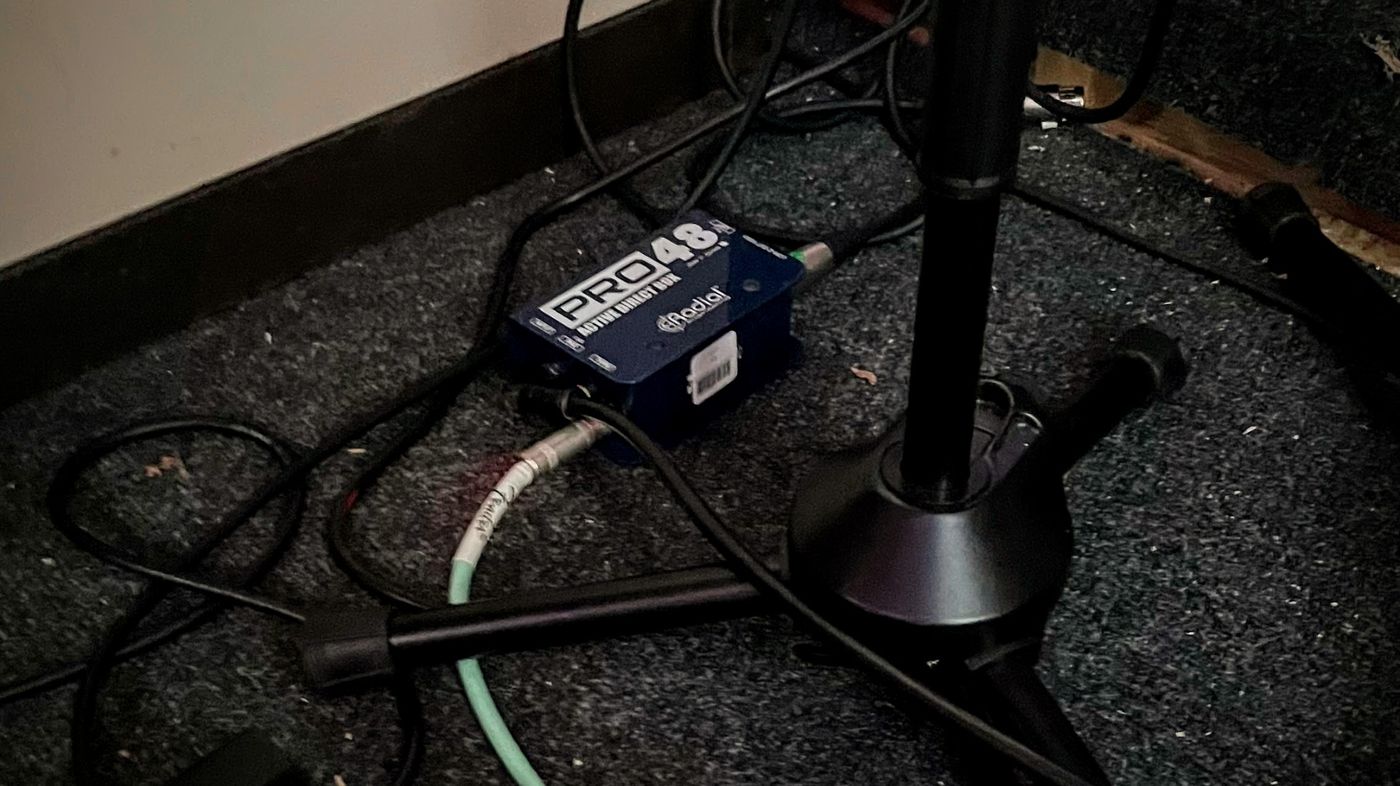
Fig 16: Clean direct line-in signal capture for the guitar
The Phase-Flipped Rear Mic Technique: Placing a microphone behind the amp captures the darker, highly resonant sound of the rear speaker cone. However, because the sound wave is moving away from the rear mic (and toward the front mics), the AKG C414 signal must have its phase flipped in the DAW to prevent phase cancellation. Additionally, by pointing it toward the player, this mic captured the acoustic, percussive "chug" of the pick hitting the unamplified strings. While not strictly necessary for an electric guitar recording, blending this physical string noise underneath the distorted signal added incredible human character and realism to the final tone.
Troubleshooting the Ghost Buzz Just as we were ready to hit record, we encountered a massive session killer: a loud, aggressive buzz suddenly flooded the monitoring.
Troubleshooting in a small, non-commercial space is always a challenge. We quickly isolated the signal chain. The buzz wasn't coming from the amplifier itself, the cables were clean, and the guitar's grounding seemed fine. The interference was completely inexplicable until the guitarist casually reached into his pocket and pulled out his smartphone to check a message.
The moment the phone left his pocket, the buzz vanished entirely. The guitar's magnetic pickups had been acting as an antenna, picking up intense electromagnetic interference (EMI) from the cellular device. It was a bizarre, "ghost in the machine" moment, but a stark reminder for future sessions: always make the musicians empty their pockets before tracking high-gain guitars.
With the phones securely placed outside the tracking area, the signal was dead quiet, and the guitarist laid down a flawless wall of continuous punk energy
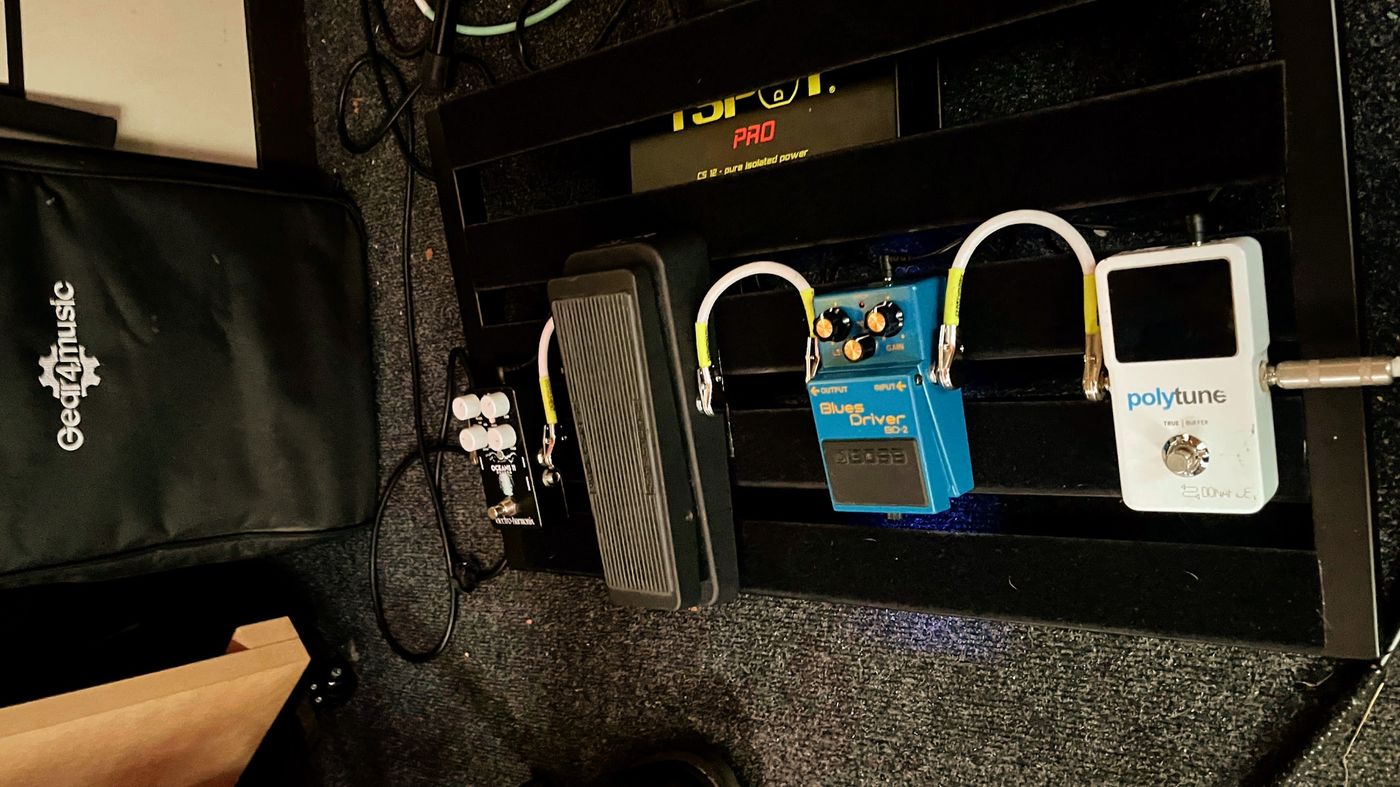
Fig 17: Alex’s pedal board
Tracking the Wall of Sound: Layering and Arrangement With the signal path finally clean and free of interference, we began the heavy lifting of the guitar tracking. To achieve a massive, commercial punk aesthetic, a single guitar track rarely suffices. I instructed the guitarist to lay down the main rhythm track, and then immediately double-track it. Double-tracking requires the musician to perform the exact same part a second time; when these two independent takes are panned hard left and right in the final mix, it creates an incredibly wide, aggressive, and phase-rich wall of sound.
We then moved on to the solo section, which required a modular approach. I recorded the solo completely separately from the main takes, capturing multiple takes of it. This meticulous layering ensures we have maximum flexibility for comping the perfect lead line later.
However, a distinct arrangement problem emerged during playback: as Deadbeat Bracket has only one guitarist there was no rhythm guitar being played during this part.
The High-End Strumming Solution Right as we were about to call it a day and wrap the session, the guitarist began absentmindedly playing some fast, high-end chord voicings. The tone was fantastic—bright, percussive, and full of kinetic energy. I immediately asked him to track that specific high-end strumming pattern underneath the entire solo section.
This spontaneous addition provided the exact rhythmic momentum the track was missing, it ensured that the song’s relentless drive never dips while the solo takes center stage. With those final, critical layers captured, the guitar tracking was officially complete.
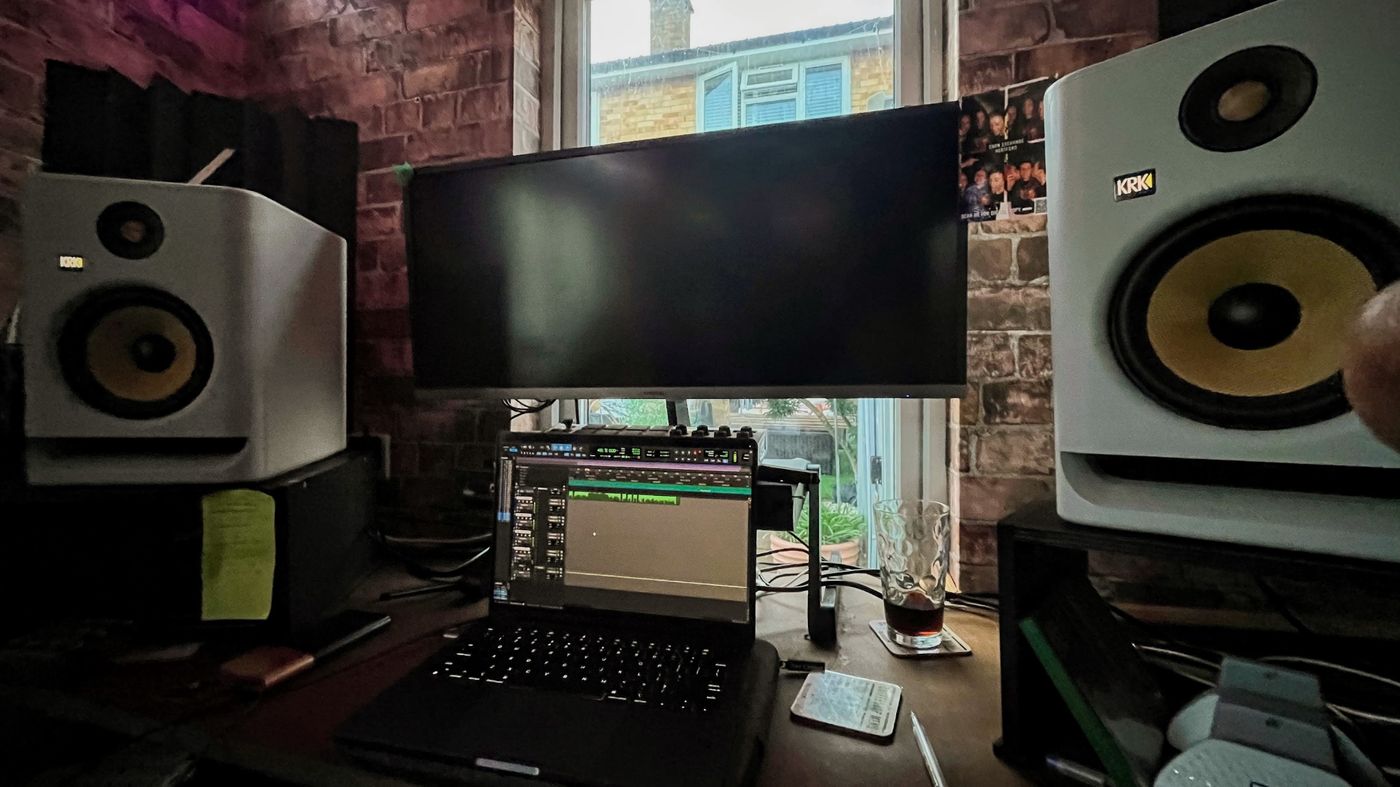
Fig 18: The monitoring and recording setup
Day 3: Stevenage Vocal Tracking and Punk Rock Choirs
11th June, 2026
With the rhythm section and guitars locked in, the final tracking day was dedicated entirely to the vocals. Operating out of Cam’s studio space in Stevenage, the goal was to capture an aggressive, larger-than-life vocal presence that could cut through the dense wall of distorted guitars and heavy drums.
To achieve this, I implemented a very creative and technical vocal tracking strategy, heavily utilizing polar pattern manipulation to turn three band members into a massive punk rock choir.
The Dual-Mic Lead Vocal Setup For the lead vocals, relying on a single microphone wasn't going to provide the exact texture I needed. Instead, I built a dual-mic configuration, placing both a dynamic and a condenser microphone directly next to each other. The vocalist performed right in front of both, projecting into them with equal sound pressure:
- Detail & Air (Condenser): Neumann U87. Used to capture the articulation, breath, and high-frequency presence of the vocal.
- Weight & Aggression (Dynamic): Shure SM7B. Used to capture the physical weight, midrange push, and natural compression of the performance (Nail The Mix Staff, 2025).
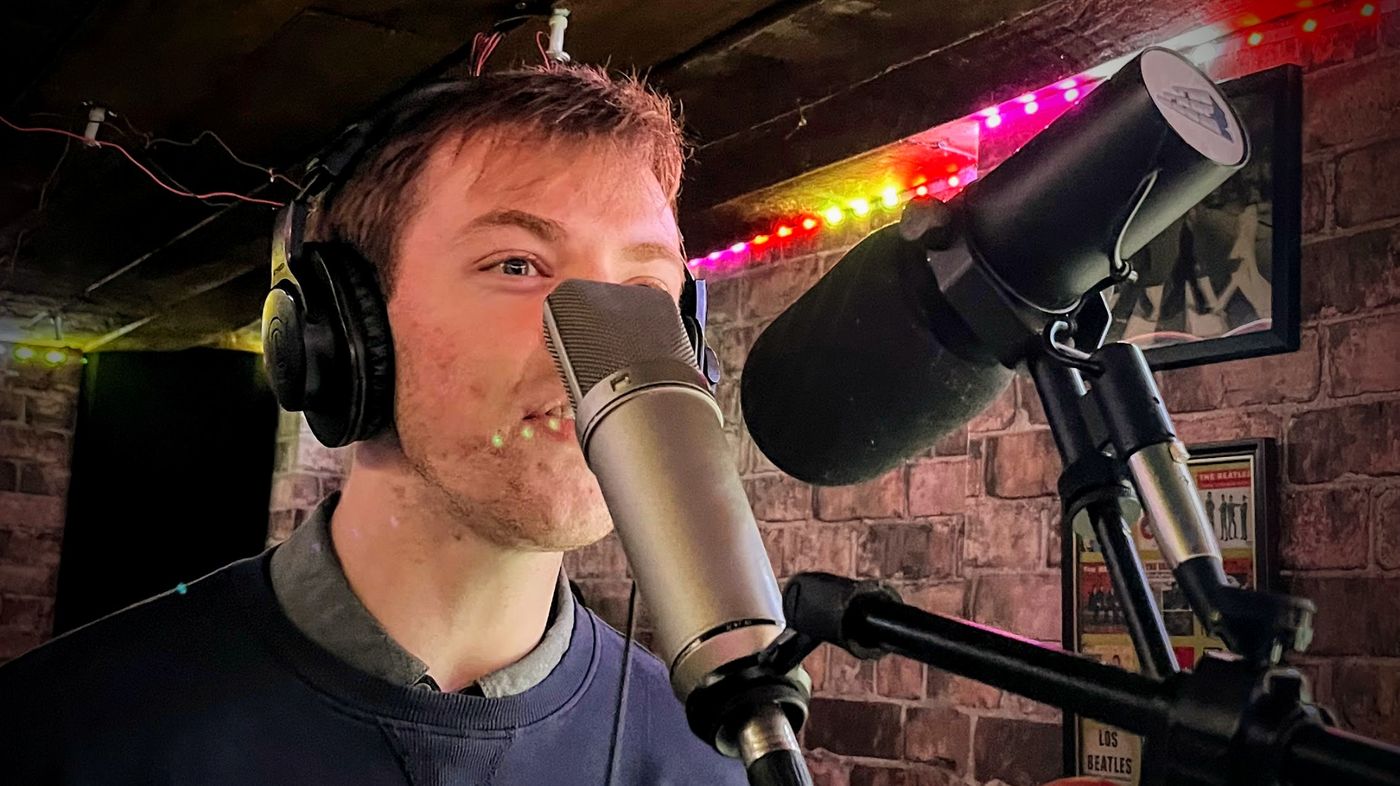
Fig 19: Dual-mic setup featuring the Neumann U87 and Shure SM7B
By recording the main takes and the double tracks (DTs) through both microphones simultaneously, I gave myself ultimate tonal flexibility for the mixing stage. I can seamlessly blend the aggressive midrange of the SM7B with the high-end sheen of the U87 without dealing with the phase issues that occur when tracking different takes on different mics.
Building the Wall of Vocals: Once the lead vocals and doubles were complete, we moved on to the backing vocals (BVs). I wanted to record a massive, unified choir sound that makes the chorus explode. To build this without making the mix sound muddy, I utilized multiple iterations of the band, physically moving them around the room and manipulating the polar patterns on the Neumann U87.
Here is the exact progression of how we stacked the backing vocals:
- Iteration 1 (The Power Core): I kept the dual-mic (U87 + SM7B) setup. All three band members stood together, in front of the mics. We tracked two layers in this position. The result was pure, driving punk energy.
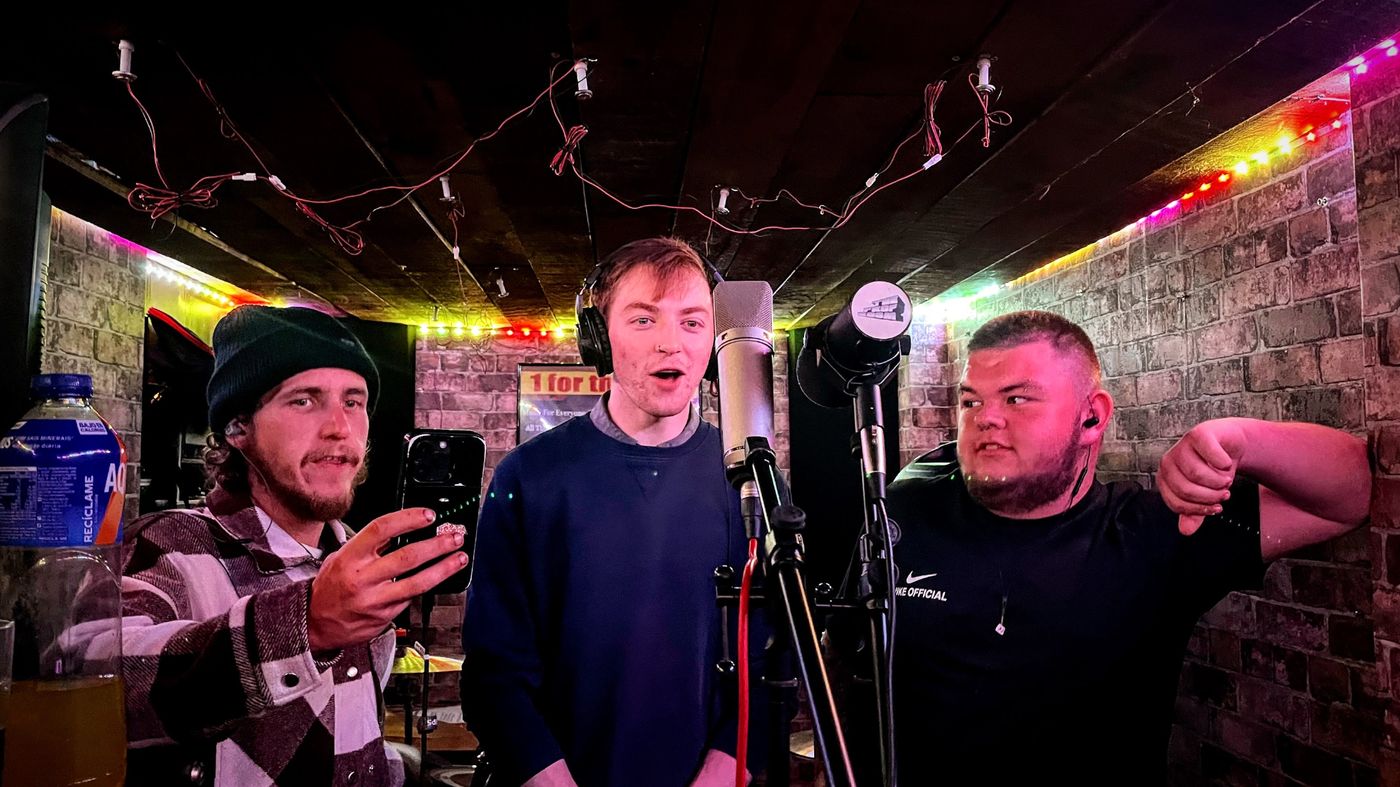
Fig 20: All three of the band members tracking vocals in front of the dual-mic setup
- Iteration 2 (The Circle - Omni): I dropped the SM7B and moved strictly to the Neumann U87. I flipped the polar pattern to Omnidirectional and placed the band in a circle entirely around the microphone. This captured a highly phase-coherent, natural blend of their voices interacting with the room.
- Iteration 3 (The Backing Duo - Cardioid): I removed the main vocalist from the mix. I placed the two remaining band members directly in front of the U87 in a standard Cardioid pattern to capture a focused backing vocal layer.
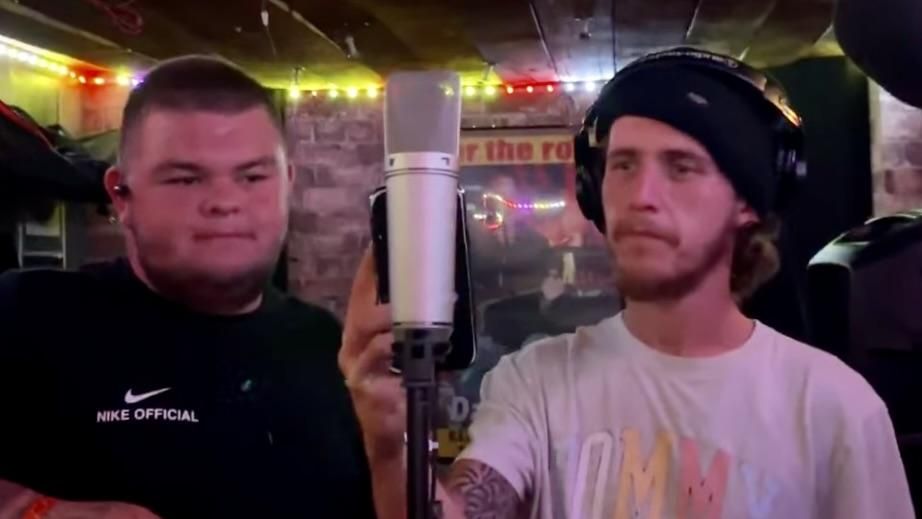
Fig 21: Two band members tracking vocals into the Neumann U87 in a standard Cardioid pattern
- Iteration 4 (The Face-Off - Figure-8):To artificially expand the perceived size of the vocal ensemble and generate a massive choir energy, I utilized a single Neumann U87 switched to a Figure-8 (bidirectional) polar pattern. By positioning the two band members on exact opposite sides of the microphone, facing each other, I capitalized on the front and rear pickup lobes of the capsule. This "face-off" technique effectively captured a highly dynamic dual vocal performance that added immense thickness, width, and depth to the final choir arrangement.
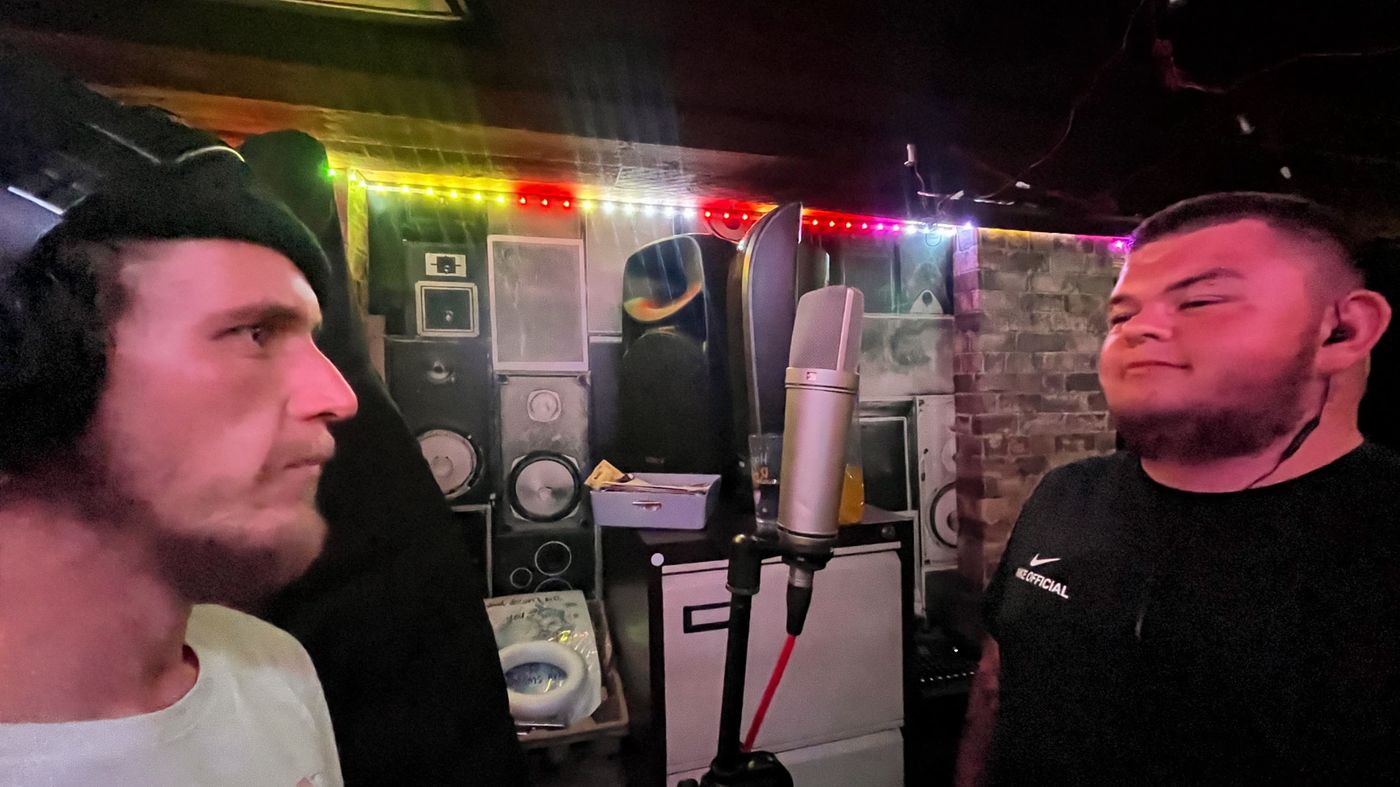
Fig 22: Two band members facing off on opposite sides of the Neumann U87 in a Figure-8 pattern
- Iteration 5 (The Ambient Wash - Omni): For the final spatial layer, I pushed the whole band into the furthest possible corners of the room. I set the U87 to Omnidirectional and recorded them shouting from the distance. We tracked this twice. This created a massive, stadium-like width behind the dry, close-miked vocals.
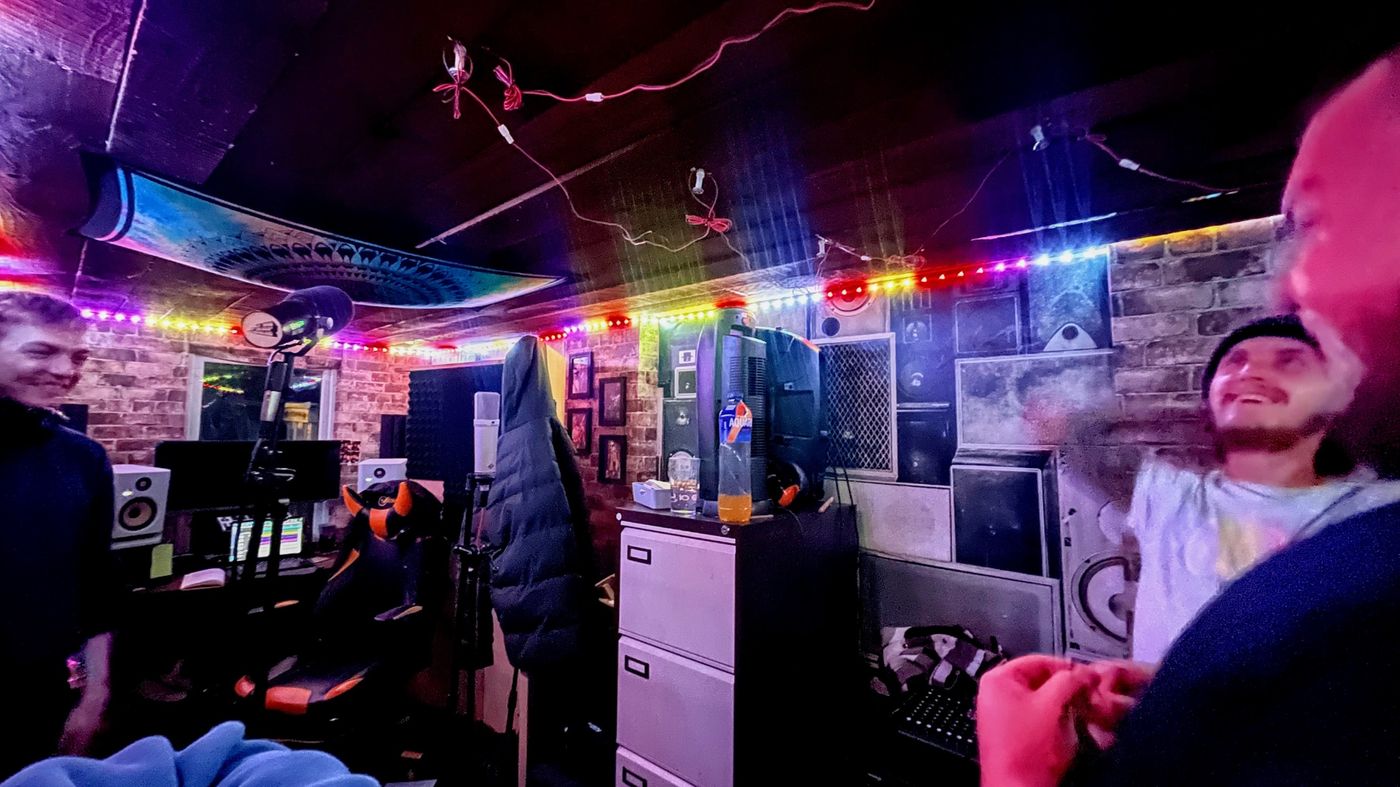
Fig 23: Band members spaced in the room corners into the Neumann U87 in an Omnidirectional pattern
The Final Creative Polish Technical routing aside, producing is about recognizing what the song needs emotionally. At the very end of the session, I brought the whole band back together around the mic and had them sing the phrase "Other Guy" in unison for the outro. It wasn't strictly planned, but it felt like the perfect musical resolution to the track.
With those final gang vocals captured, the tracking phase for Deadbeat Bracket was officially complete. We successfully bypassed the limitations of a small recording environment by leaning into polar patterns, creative layering, and human energy.
References
Audio University (2023) Use these recording techniques for perfect guitar tone every time, 6 April.
Bartlett, B. (1991) 'Stereo microphone techniques', in [book title if known]. Boston, MA: Focal Press, pp. 23–28.
Beato, R. (2019) The BEST way to record GUITAR, 27 June.
Bendeth, D. (2026) My Guitar Amp Micing Setup For Great Guitar Tone. YouTube, 25 March. Available at: https://www.youtube.com/watch?v=za8m2nB0B9c (Accessed: 16 August 2026).
Blomqvist, P. (2010) Stereo microphone techniques in drum recording. Bachelor’s thesis. Luleå University of Technology. Available at: https://www.diva-portal.org/smash/record.jsf?pid=diva2:1025450 (Accessed: 25 April 2026).
Gasson, J. (n.d.) Drum miking techniques. Third Circle Recordings. Available at: https://thirdcirclerecordings.co.uk/recording-blog/drum-miking-techniques/ (Accessed: 25 April 2026).
Gatski, J. (2013) 'Audix BP7 Pro', Sound on Sound, February. Available at: https://www.soundonsound.com/reviews/audix-bp7-pro (Accessed: 22 July 2026).
Henshall, M. (2015) 'Recording & mixing bass guitar', Shure, 23 February. Available at: https://www.shure.com/en-GB/insights/recording-mixing-bass-guitar (Accessed: 22 July 2026).
Hirst, J. (2015) Drum recording techniques. Miloco Studios. Available at: https://milocostudios.com/toptip/drum-recording-techniques-by-joe-hirst/ (Accessed: 25 April 2026).
La Cerra, S. (2026) 'Audix D6X microphone: a Mix real-world review', Mix, 15 July. Available at: https://www.mixonline.com/technology/reviews/microphones/audix-d6x-microphone-a-mix-real-world-review (Accessed: 22 July 2026).
Nail The Mix Staff (2025) 'SM7B microphone', Nail The Mix, 17 September. Available at: https://www.nailthemix.com/sm7b-microphone (Accessed: 22 July 2026).
Robjohns, H. (2003) 'Recording drums: a practical guide', Sound on Sound, February. Available at: https://www.soundonsound.com/techniques/recording-drums (Accessed: 25 April 2026).
Robjohns, H., Senior, M. and Walker, M. (2010) 'Q. Why do I sometimes see singers using two microphones on stage?', Sound on Sound, July. Available at: https://www.soundonsound.com/sound-advice/q-why-do-sometimes-see-singers-using-two-microphones-stage (Accessed: 22 July 2026).
RØDE Microphones (2018) Stereo microphone techniques. Available at: https://rode.com/en-gb/about/news-info/stereo-microphone-techniques (Accessed: 25 April 2026).
Royer Labs (no date) Recording electric guitar. Available at: https://royerlabs.com/recording-electric-guitar/ (Accessed: 22 July 2026).
Schneider, M. (2014) Moses Schneider about "the Wurst" — the alternative workbook. YouTube, 1 September. Available at: https://youtu.be/__Bh3D_Pvt8 (Accessed: 16 August 2026).
White, P. (2001) 'Recording bass instruments', Sound on Sound, October. Available at: https://www.soundonsound.com/techniques/recording-bass-instruments (Accessed: 22 July 2026).